Introduction
Ableton Live is packed to the brim with potent, feature-rich synthesizers and effects. And out of all of them, Operator may be one of Live’s most versatile tools ever; capable of undertaking a staggering number of roles as both an instrument and sound design tool. While many music makers turn to third-party solutions for full-featured synths such as Vital, Serum, and Pigments; they may be doing so without understanding the full capacity of this fantastic tool that has been bundled with Live Suite edition since way back in 2005.
What makes Operator so great anyway?
While at its core, Operator is an FM synthesizer, it also encompasses many elements and features of both subtractive and additive synthesizers. In short, since Operator has so many different avenues of manipulating an audio waveform, practically any sound can be created with Operator IF we know how to parse out the individual characteristics of a given sound.
A key feature of Operator that has made it a desirable choice for studio musicians, live performers, and hobbyists alike is its truly excellent level of performance optimization. Even using a preset that utilizes a lot of the instrument’s features simultaneously; Operator requires very few system resources compared to its third-party competition. While on the surface, resource overhead may not sound like the most exciting feature, rock-solid performance, and low latency is absolutely crucial for performing musicians. A synth having a rich feature set at the cost of a great deal of latency restricts its use to sound design in the studio.
Beyond its performance ability, Operator packs an impressive number of features under the hood. The addition of customizable, user-made waveforms grants Operator a staggering capacity for creating different sounds with FM synthesis.
So What is FM Synthesis?
FM synthesis is the act of using multiple oscillators to modulate one another's frequency - Frequency Modulation. Complex FM synthesis requires synthesizers with multiple oscillators or operators to interact with each other. In FM Synthesis, oscillators are paired with amplitude envelopes and the resulting signal can be fed back into one or more of the oscillators in order to modulate their frequencies.
The route the signal takes determines an oscillator’s role as either a carrier - an oscillator that outputs an audio signal, or a modulator - an oscillator that modifies the waveform of another oscillator. These two types of signal pathways are determined via predefined algorithms in the FM instrument.
This is distinctly different from the signal flow of a subtractive synthesis - wherein an oscillator’s signal is sent through an amplitude and/or filter envelope to ‘subtract’ from the oscillator’s initial signal
Operator’s Interface Overview
Especially considering the complex nature of FM Synthesis, it is completely understandable why a new user would drop Operator into a channel for the first time and feel somewhat overwhelmed by its interface. Operator packs a ton of functionality into a very tight, streamlined package. If you’re unsure of what you’re looking at; it’s easy to dismiss Operator as being a wall of arcane knobs that produce robot sounds. To the uninitiated, the interface may not be the easiest to read at a glance. But with only a little bit of time and practice, it will become second nature to jump to the specific feature your sound needs.
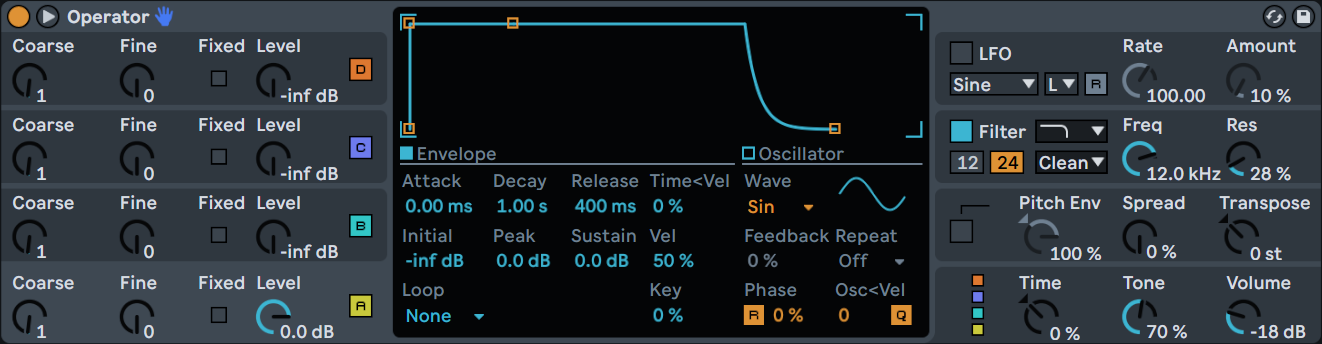
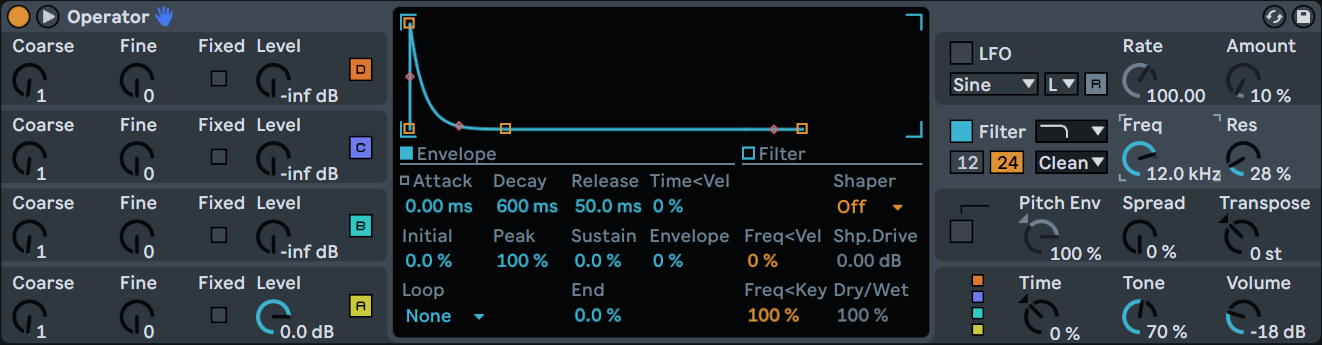
The first thing to understand about Operator’s interface is that the display port in the center updates dynamically depending on which tab is selected on the outer ‘shell’ of the instrument. Make sure to expand Operator using the triangle button next to the device’s power toggle in the upper left. The left side of Operator’s shell contains the individual oscillators. By clicking one of the four sets of knobs labeled A-D on the left side, the display in the center displays the details of the selected oscillator, including the ADSR amplitude envelope and waveform selector.
Operator’s Oscillators
Another important idea to understand about these oscillators is also a key concept of FM Synthesis - tuning the ‘Coarse’ knobs of the left edge of the interface tunes the oscillators not by octaves, but instead following the harmonic series. The oscillators can also be tuned manually by using the ‘Fixed’ toggle next to the Level controls.
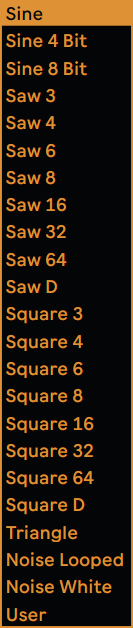
Operator has a diverse selection of waveforms as a starting point for each oscillator. All the 'classic' waveforms - sines, saws, squares, triangles, and white noise are on offer in several different forms according to how many harmonics are used in the waveform's resynthesis. Operator allows for user-customized waveforms as well, which are customizable using a defined number of harmonics in the waveform - 16, 32, or 64. This is yet another core feature that grants Operator incredible versatility: The ability to select and create such a multitude of different oscillator waveforms is yet another feature that makes Operator a distinctly modern FM Synth.
Older FM gear such as the iconic Yamaha DX7 only generated sine waveforms by default and required a bit of sound design wizardry to coax out other wave shapes. Operator including these as basic waveforms means that more complex modulation scenarios are possible without using half of a synth’s resources to achieve your starting point. By comparison, in the Yamaha DX7's manual, the instructions to produce a simple square wave are more than a page long!
Operator Main Controls
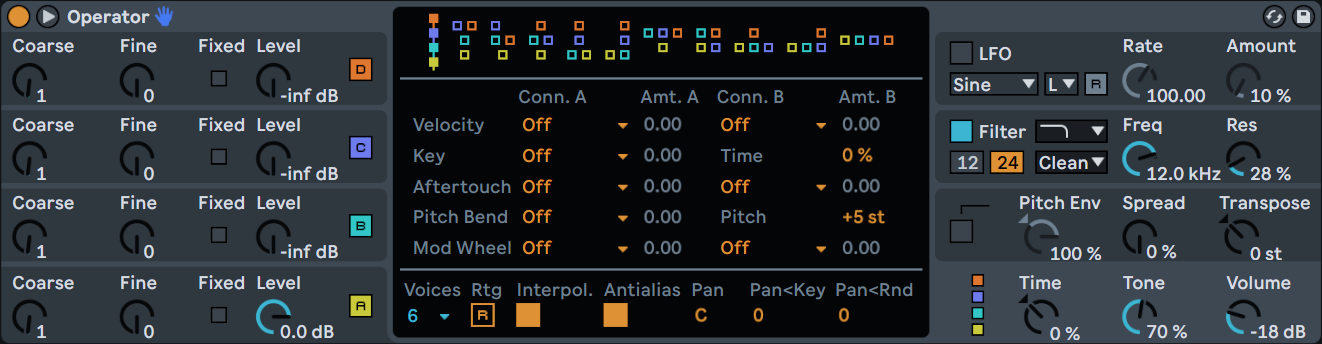
You may have noticed that the four identifying colors for the A-D Oscillators can also be found in the lower right of Operator’s shell. Selecting this tab reveals the main control window for the instrument. The outer controls in the shell include ‘Time’, for determining the global control of all of the envelopes in the patch, ‘Tone’ for controlling the high-frequency content and brightness, and a master Volume control in the lower right corner of the interface.
When the main control tab is selected, the top of the internal display shows Operator’s 11 included algorithms all in a row. The signal flow each algorithm provides can be read from top to bottom of the shape, with the colored squares representing the corresponding oscillator of the same color. Squares that feed into another represent oscillators that modulate the oscillator below them. Squares in the bottom row of a given shape are acting as carriers and output a signal. Here are a few examples:
 | By default, Operator uses Algorithm 1 which is a straight path in which oscillator D modulates oscillator C. The resulting signal then modulates oscillator B and finally oscillator A acts as the carrier for the resulting signal to be output. D>C>B>A |
 | As a second example, algorithm 2 uses both oscillator D and C to simultaneously modulate oscillator B together. The resulting signal is then fed into a single carrier, oscillator A |
 | Algorithm 8 has two carriers, A and C which are modulated by oscillators B and D respectively |
 | Algorithm 11 is a unique option because all four oscillators are used as carriers. This means that while the oscillators themselves have FM-styled controls for their pitch and envelope information, Operator is effectively acting as a 4-voice additive polysynth while in this mode. |
Basic Filtering
Clicking on the filter section of Operator’s shell reveals a detailed view of Operator’s filter.
In the outer controls ‘Freq’ defines the cutoff point for the filter, conveniently located next to shape and type controls as well as filter resonance controls. The detail pane holds a few additional important controls. First, the filter’s ADSR controls define the shape of the filter. The shaper allows you to apply a waveshaping curve to the filter as well.
In the outer Filter controls, using the dropdown to select any filter type other than “Clean” will reveal the Filter Drive controls in the detail view. Filter Drive used in tandem with the Shaper controls allows for powerful control over the overall timbre of the instrument.
LFO Selection Basics
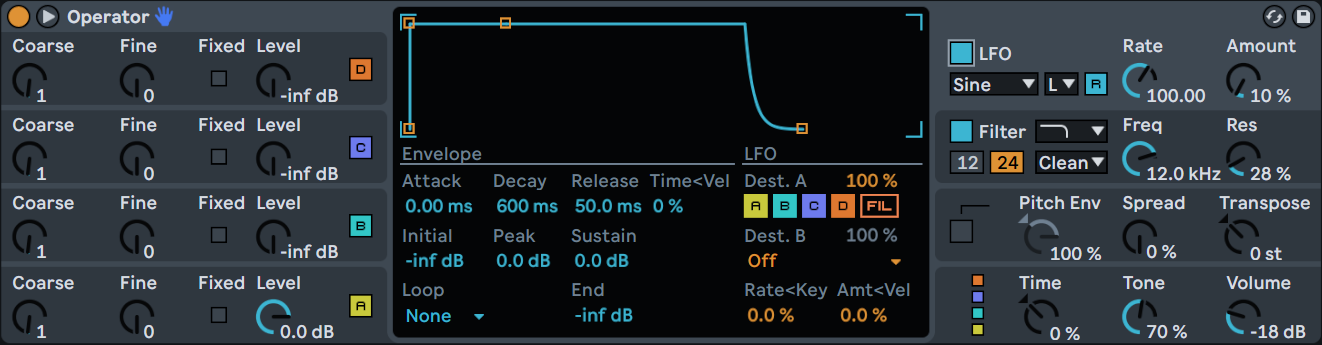
Toggling on the LFO or selecting the LFO tab in the upper right of Operator’s shell reveals the LFO controls in the display panel. The controls in the outer shell are mostly self-explanatory - A rate and an Amount knob to control the speed and intensity of the LFO. The dropdown menu for the LFOs shape can be found here as well.
By default, when the LFO is turned on initially, the LFO will be changing the pitch of all 4 Oscillators - which will be highlighted under ‘Dest. A’. While Operator only has a single LFO, it can be pointed to many different destinations simultaneously and is very effective even if there is only one.
Operator Pitch Envelope
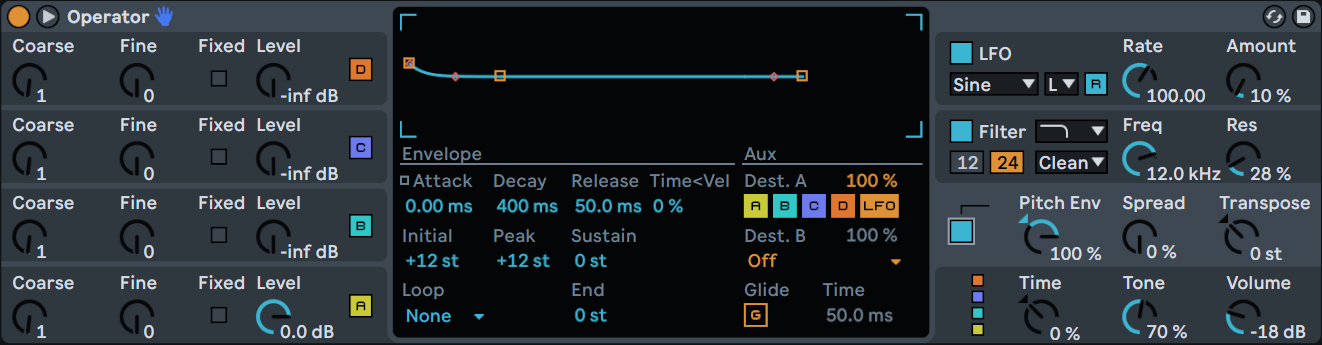
The Pitch Envelope section of Operator contains controls for affecting the pitch of the instrument over time. Along with controlling the shape of the envelope with attack, decay, and release controls, the pitch envelope’s initial starting point, Peak point, and the pitch at which the sustained note holds.
Like the LFO, the pitch envelope’s destination can be determined by toggling the four A-D controls under Destination A. The pitch envelope can also be sent to the LFO from here.
Glide time can be configured from the Pitch Envelope view as well, toggling on the ‘G’ button at the button allows for the glide time to be defined right next to it.
Conclusion
With a better understanding of Operator’s interface, it really does become second nature to reach for the controls you need instinctively with a little practice. Join us in our next post for some quintessential sound design recipes for Ableton’s Operator, starting with some quintessential “Bread and Butter” sounds that every producer needs