
This post is supplemental to the video above called “The Ultimate Guide to Latency in Ableton Live”
Hardware latency can be managed by using the lowest buffer size you can “get away with” without the computer running out of resources and thus introducing glitches and audible dropouts. The lower the buffer size, the lower the hardware latency, but the trade off is your computer will need to work harder. Higher buffer sizes can help your computer playback more tracks and more plugins, but this will also increase the latency. I tend to leave my system at 128 Samples.
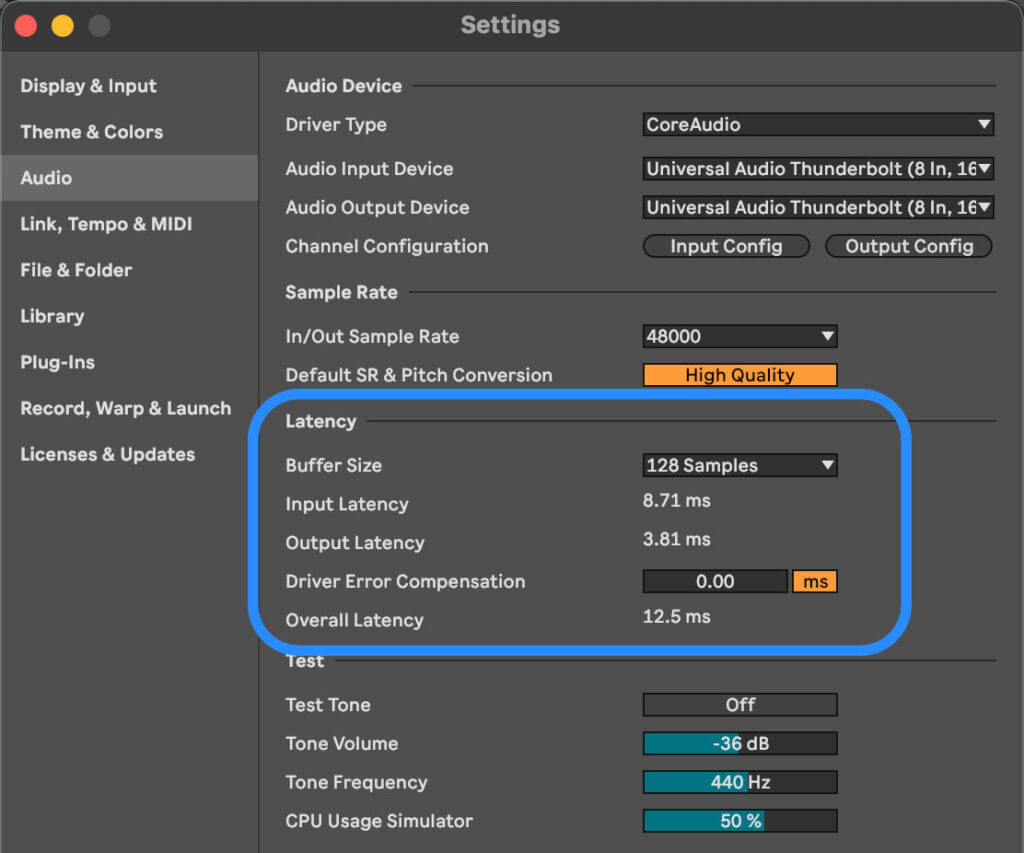
Latency Source 1: Audio Device / Hardware Settings
Hardware latency can be managed by using the lowest buffer size you can “get away with” without the computer running out of resources and thus introducing glitches and audible dropouts. The lower the buffer size, the lower the hardware latency, but the trade off is your computer will need to work harder. Higher buffer sizes can help your computer playback more tracks and more plugins, but this will also increase the latency. I tend to leave my system at 128 Samples.
Mixing & Mastering Course

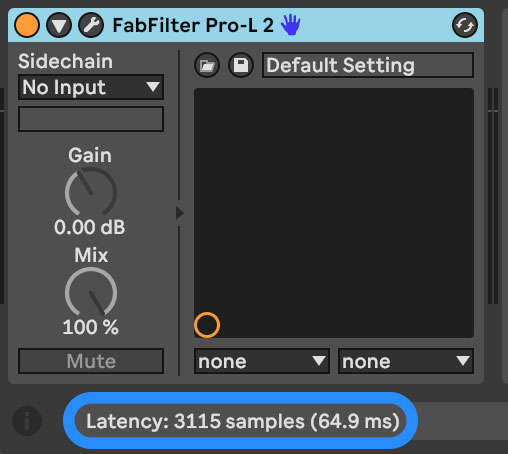
Latency Source 2: Device and Plugin Processing Latency
If you are experiencing latency that you’ve never experienced before and this latency doesnt occur when you load up a new Ableton project, then likely the latency youre experiencing is actually coming from an Ableton Device or a Plugin. Some plugins create latency in order to do what they do. You can find out whether or not a plugin creates latency by hovering your mouse over the title bar and looking down in the bottom left corner of your screen.
Devices that create Latency:
| Device: | Latency Introduced: |
| Compressor | 0, 1, or 10ms based on lookahead |
| Limited | 1.3, 2.7, or 5.3ms based on lookahead |
| Gate | 0, 1.5, or 10ms based on lookahead |
| Corpus | 1.5ms |
| Dynamic Tube | 4 samples (0.091 ms) in HQ Mode |
| Erosion | 5ms |
| Spectral Time | 29 ms |
| Spectral Resonator | 32 ms |
| Auto Shift | 32 ms |
| EQ Eight | 16 samples (0.36 ms) in HQ Mode |
| Overdrive | 0.113 ms |
| Redux | 1.3 ms |
| Vinyl Distortion | 3 ms |
| Saturator | 4 samples (0.091 ms) in HQ mode |
| Glue Compressor | 0.73 ms in HQ Mode |
| External Audio Effect | Same as “Overall Latency” in Audio Settings |
| Roar | 7 Samples .15ms in HQ Mode |
Devices that do not make latency:
| Align Delay Amp Audio Effect Rack Auto Filter Auto Pan Beat Repeat Cabinet Channel EQ Chorus-Ensemble Compressor (no lookahead) Delay Drum Buss Echo EQ Eight (Standard Mode) EQ Three | Filter Delay Gate (No Lookahead) Glue Compressor (Standard Mode) Grain Delay Hybrid Reverb Looper Multiband Dynamics Phaser-Flanger Resonators Reverb Roar (Standard Mode) Saturator (Standard Mode) Shifter Utility Vocoder |
Best Practices to Avoid Latency Issues:
- The easiest way to manage latency issues is to avoid using plugins and devices that create significant latency when you are in the “songwriting phase” or at least avoid using those kind of effects until most all of your instrument are recorded.
- This is not always possible so the next best way to manage latency is to only temporarily use devices and plugins that create latency and once you've got the sound you're looking for, resample or freeze and flatten the track so that the offending device is no longer in the set.
- This is not always possible so the next best way is to utilize “Reduced latency when monitoring feature” in the “Options” menu. This will remove any plugin delay compensation in an armed track with the monitoring set to “in” or “auto”. If this doesn't remove the latency completely, then likely you need to adjust the track output to go directly to the outputs of your audio device and skip any groups or busses or the main or master track. Once the part has been recorded, simply change the track outputs back to where they go.
- When recording acoustic instruments, vocals, and especially drums in audio tracks, disable the new “Keep Latency” switch. This will remove any plugin delay from the resulting recording and can help align the timing better. Avoid using this for midi instrument and effects and only use this one audio tracks if timing issues present themselves.
- When using external audio processors, use the External Audio Effect device. This will automatically compensate for the roundtrip latency of your audio system and ensure rock solid timing for your processed audio.
- When using external midi synths and sequencers, use the External Instrument device. This will automatically compensate for the roundtrip latency of your system and ensure rock solid timing for your recorded audio.
- Avoid using plugins that make latency BEFORE plugins with LFOs or sequencers in a signal chain. This will throw the timing off. Only place plugins that create latency AFTER time based devices or plugins.